Migrating data can be tricky and stressful, even under the best conditions. Jira migrations can be particularly complicated due to the various applications many organizations use in conjunction with it. As you are likely aware of, in an effort to focus on offering a better Cloud service, Jira Server has reached the last stage of its End-of-Life transition, with no further support planned after Feb. 2024. With this being the case, a lot of companies are starting to Migrate out of their Server instances to Jira Cloud. This guide is intended to help you navigate migrating Git Integration for Jira from Server to Cloud.The steps are the same from Jira Server, as well as Jira Data Center.
Housekeeping
First, let’s get a few housekeeping things out of the way:
- We recommended that you complete your base Jira migration of users and projects first before attempting to migrate or install your other applications. The Atlassian Migration Guide for Cloud is a good place to start.
- It’s important to note that in order to get all of your previous Git history to link properly, the Jira project keys must stay the same. If the Jira projects are renamed, or the issue keys change, this could cause items to be linked incorrectly.
Performing the Migration
With those out of the way, let’s discuss the migration process in context to the Git Integration for Jira application. Unfortunately, there are no automatic migration options for this application. While that may sound worrisome, there is no need to fret!
All that needs to be done after you have installed our application is to recreate your integrations. Thankfully, the process is almost the same as what you are used to in the Self Hosted version of our application.
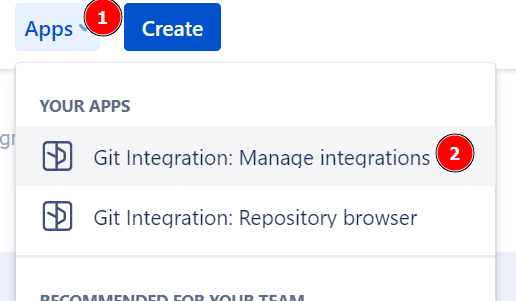
- Navigate to your “Manage Integrations” screen. Click the ‘Apps’ menu from the top menu bar, then choose “Git Integration:Manage integrations”
- Click the “Add Integration” button
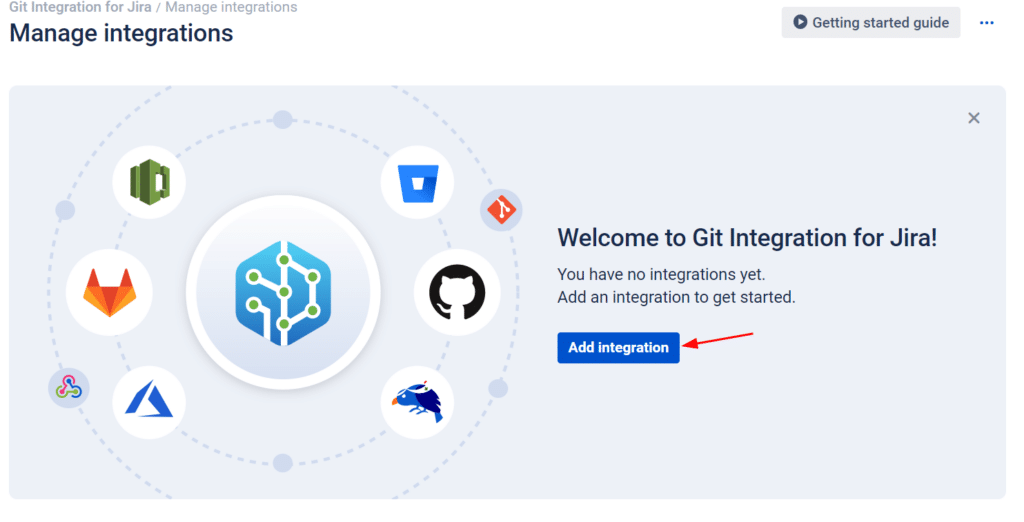
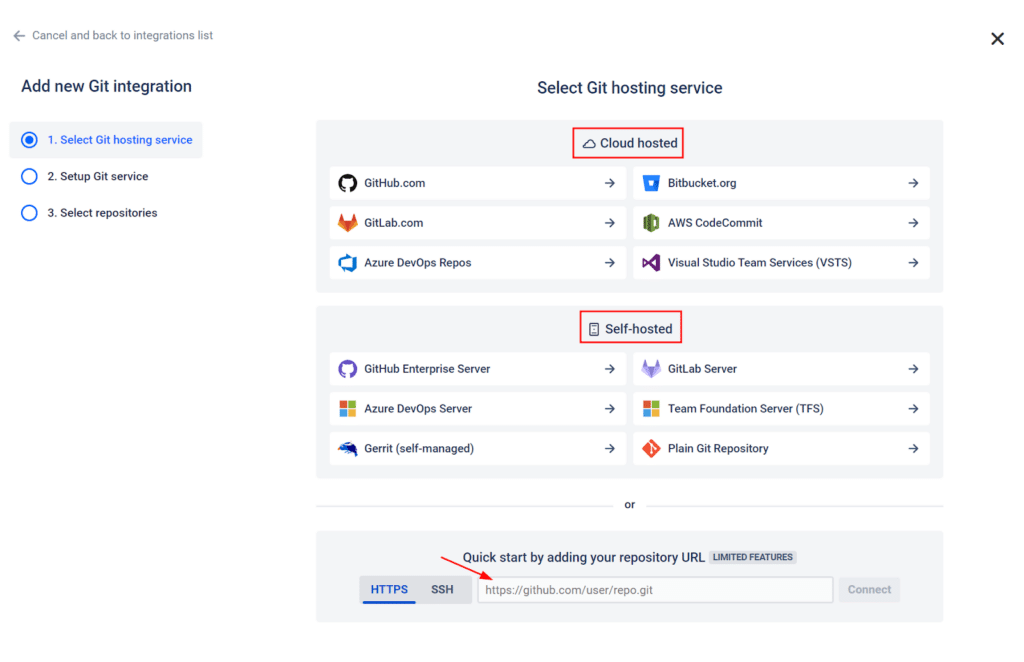
- Choose your Git service, taking note of the hosting service. Please make sure to choose between Cloud and Self Hosted options, depending on which you use. If your Git service is not listed, or if you would like to create a limited feature (plain) Git connection, paste the Git repo URL in the field at the bottom of the page.
- The various Git services offer different authentication methods, so please refer to our specific integration guides for your Git service listed below:
Since all of the operations that GIJ performs are based on your Git history, all of your relevant data and associations between your commits, branches, and pull/merge requests will relink once you have recreated those integrations.
There is only one item that might need to be migrated to your new Jira Cloud instance, which is your manual commit associations. If you have ever had to manually re-associate commits, we store that data in a file named IssueCommitChanges.txt, which can be found in here: <Jira-Home>/git-plugin/issueCommitChanges.txt. If that file has a size larger than 0KB, please copy the file and reach out to our support team at [email protected]. Please provide the file, as well as your new Jira Cloud URL, and our team will insert that file into your instance to reapply those changes. If that file is listed as 0KB, there are no manual associations, and you do not need to do anything.
Take Note: The cloud version of Git Integration for Jira has some expanded authentication and integration methods when compared to the Self-Hosted version. Depending on which Git service you use, you might be able to utilize OAuth authentication, or utilize a webhook indexing approach. Please review the Cloud version of our integrations guide to familiarize yourself with the options for your specific Git provider.
That’s It
Once you have recreated the integrations and have had your manual associations reapplied if necessary, everything will be relinked to the matching Jira issues once the indexing process is complete.
Not too bad, right? Who knew a data migration could be this painless? If you’ve completed your migration, we think you’ve earned a break. Go get yourself a coffee, or take a walk, or play with a pet (even if it’s not yours – just ask if it’s ok first). Enjoy your day!
 GitKraken MCP
 GitKraken Insights
 Dev Team Automations
 AI & Security Controls